- Published on
Hosting a CTF Using CTFd on AWS
- Authors

- Name
- Basim Mehdi
Table of Contents
- Introduction
- Prerequisites
- Step 1: Create AWS Lightsail Instance
- Step 2: Configure Networking in Lightsail
- Step 3: Set Up Cloudflare DNS & SSL
- Step 4: Connect to Lightsail Instance
- Step 5: Install Docker & Docker Compose
- Step 6: Install CTFd
- Step 7: Start CTFd
- Step 8: Deploying Container Plugin
- Step 9: Shifting the CTFd Instance to Cloud
- Step 10: Configuring and Deploying Containerized Challenges on Cloud
- Step 11: Other CTFd Settings and Simple Challenge Deployement
- Lessons Learned
- References
Introduction 🚩
Welcome to the wild world of CTF hosting! In this blog, I’ll share how I hosted my own Capture The Flag (CTF) competition C00K3D CTF- Batch Zero using CTFd, deployed on AWS Lightsail, secured with Cloudflare, and powered by Dockerized challenge containers for Web and Pwn categories.
Lightsail made it easy to deploy a simple, affordable virtual private server with predictable pricing (because who doesn't love predictable bills?), while Docker let me wrangle both the CTFd platform and individual challenges in isolated containers—no more dependency drama! 😅
- An AWS account and familiarity with the Lightsail service for deploying virtual servers.
- A domain name (can be managed via Cloudflare) and a basic understanding of DNS management.
- Basic knowledge of Linux commands and how to use Docker for containerization.
- Docker and Docker Compose installed on your server to run CTFd and challenges.
- Challenge files and Dockerfiles prepared for your Web and Pwn challenges.
- Ability to connect to your Lightsail instance using SSH.
Prerequisites 📝
Before you dive in, make sure you have:
- An AWS account and a passing familiarity with Lightsail (yes, you’ll need to click a few buttons).
- A domain name (can be managed via Cloudflare) and a basic understanding of DNS management—because domains don’t just magically work, unfortunately.
- Basic knowledge of Linux commands and how to use Docker for containerization.
- Docker and Docker Compose installed on your server to run CTFd and challenges (trust me, you don’t want to do this by hand).
- Challenge files and Dockerfiles prepared for your Web and Pwn challenges (bonus points if they actually work the first time).
- Ability to connect to your Lightsail instance using SSH (because copy-pasting passwords is so 2010).
- An AWS account and familiarity with the Lightsail service for deploying virtual servers.
- A domain name (can be managed via Cloudflare) and a basic understanding of DNS management.
- Basic knowledge of Linux commands and how to use Docker for containerization.
- Docker and Docker Compose installed on your server to run CTFd and challenges.
- Challenge files and Dockerfiles prepared for your Web and Pwn challenges.
- Ability to connect to your Lightsail instance using SSH.
Step 1: Create AWS Lightsail Instance ⚡
Sign in to the AWS Lightsail console.
Click Create Instance.

Select Availaible Region closest to you, I selected Mumbai


Choose:
- Platform: Linux/Unix
- Blueprint: Operating Systems / Ubuntu 24.04 LTS
- Plan: At least 2 GB RAM / 2 vCPU (I used the
$12plan, free for 90 days—thanks, AWS!)

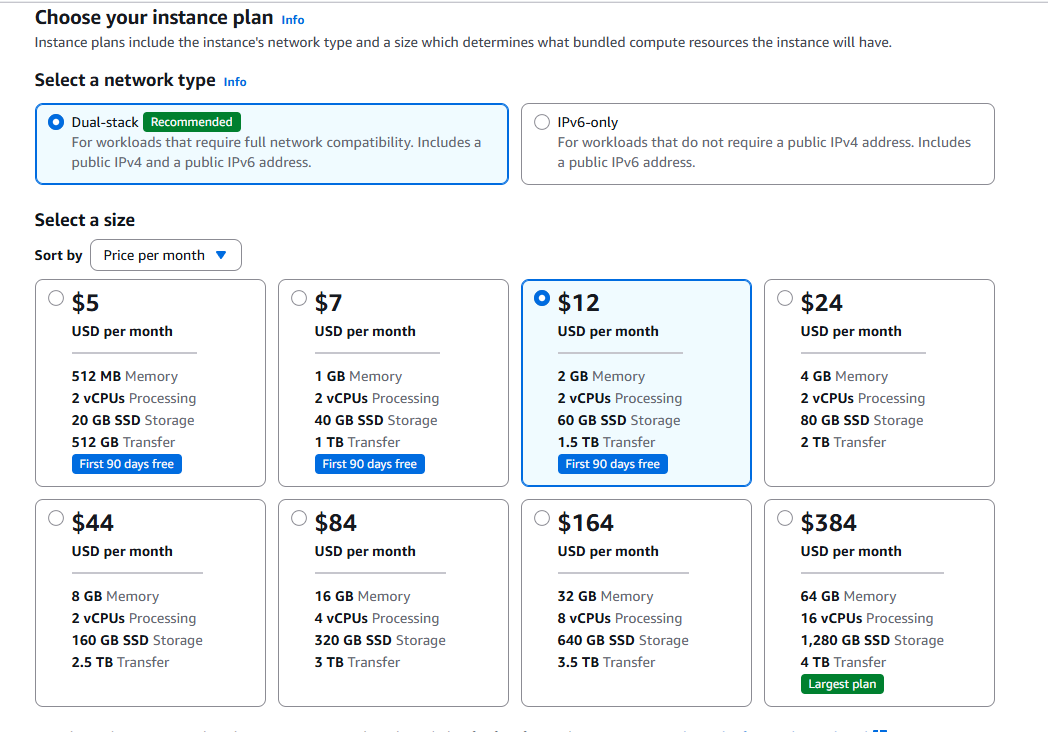
Name the instance and click Create Instance.

Step 2: Configure Networking in Lightsail 🌐
Go to the Networking tab of your instance.
Create static IP.
Add firewall rules to allow all ports, as we’ll be using the Container Plugin for CTFd (yes, all ports—let chaos reign, but only temporarily).

- Select All TCP and All UDP → Create

- Your rules configuration should look like this (if it doesn’t, you missed a step):

Step 3: Set Up Cloudflare DNS & SSL 🔒
Buy a domain from a registrar such as Hostinger.
- I bought it from Hostinger, so here's how you can join the club:
- Go to the Domains section in the left sidebar.
- Click Add new Domain.

- Enter your desired domain (without
.com,.pk, etc.) and select from the options given to you.

Buy the domain and complete the billing process. You can pay with a bank card that allows international transactions (because, of course, not all cards are created equal).
After payment, Hostinger will verify your purchase. Your domain will be ready to use within 24 hours (or whenever the DNS gods are satisfied), and you’ll get a confirmation email.

- I bought it from Hostinger, so here's how you can join the club:
Add your domain to Cloudflare.
- Sign up to Cloudflare and connect your domain (it’s easier than it sounds, promise).

- Leave the default options selected (keep the default boxes checked—don’t overthink it).

- Copy the nameservers provided by Cloudflare and update them in the Hostinger DNS settings (Nameservers tab) for your domain. DNS propagation is a waiting game—grab a coffee ☕.

- Copy these nameservers and paste them in the Hostinger DNS nameserver section.

Create an A record pointing to your Lightsail static IP.
- Check your static IP from the AWS Lightsail Instance and enter it as the A record in Cloudflare.
- Make sure to enable Proxy (orange cloud) for DDoS protection and caching.

- I also wanted a subdomain for the CTF, so I configured a CNAME record with the subdomain I wanted to add. You can do this too (because why settle for just one domain?).

- Make sure to have at least one subdomain that doesn't have Cloudflare proxy enabled for the container plugin to work smoothly (trust me, you’ll thank yourself later).

In SSL/TLS settings:
- Mode: Flexible
- Enable Always Use HTTPS (because who wants to see HTTP warnings in 2025?)

- Click on Configure → Scroll down → Select Flexible → Save

- On the left side of the navbar, go to SSL/TLS → Edge Certificates.
- Scroll down until you reach Automatic HTTPS Rewrites and enable it (because, yes, you want everything to be HTTPS by default).

Step 4: Connect to Lightsail Instance 🔑
Download the Lightsail .pem key from the AWS console (don’t lose it!), then:

chmod 400 `LightsailDefaultKey.pem`
ssh -i `LightsailDefaultKey.pem` ubuntu@<Lightsail-StaticIP>

Step 5: Install Docker & Docker Compose 🐳
sudo apt update && sudo apt upgrade -y
sudo apt install docker.io docker-compose -y
sudo systemctl enable docker --now
Verify it worked (or start troubleshooting):
docker-compose --version
docker --version
docker-compose --version

Step 6: Install CTFd 🏗️
Clone the repository on your local system (because copy-pasting code from Stack Overflow only gets you so far):
git clone https://github.com/CTFd/CTFd.git
cd CTFd

Step 7: Start CTFd 🚀
- Make sure you are in the CTFd directory where the
Dockerfileis located.
sudo docker-compose up # testing it locally

- At
0.0.0.0:8000you can see the CTFd instance running (if not, check your Docker logs and pray 🙏).

- Set up according to your needs and make sure you remember the admin credentials (write them down, you will forget otherwise).
Step 8: Deploying Container Plugin 🧩
- Modify the
docker-compose.ymlvolumes section for the Container Plugin (yes, you really need that Docker socket):
services:
   ctfd:
      ...
      volumes:
         ...
         - /var/run/docker.sock:/var/run/docker.sock # This should be added here
         ...
- Clone the Container Plugin repository:
git clone https://github.com/TheFlash2k/containers.git
mv containers /path/to/CTFd/plugins/

- Now run the CTFd instance again:
sudo docker-compose up
- Make sure you login with Admin account that you previously Created.
- Go to Admin Panel -> Plugins and Click on Containers.

- Now go to settings and configure the plugin by entering valid details. - Docker Socket Path:
/var/run/docker.sock- Hostname:localhost or the IP of your instance- Let all other settings default or as I set them.

Click Save and you should see a success message Docker Connected.
Now you can add challenges using the Container Plugin (finally, the fun part!):
- Go to Challenges in the Admin Panel and click + to create a challenge.
- On the options shown at the right side, click on container.

- Fill in the required details.
- Prerequisite: A built Docker image for the challenge (if you skipped this, go back).

Make sure the
Portyou specify is exposed in theDockerfileof the challenge.- For instance, in my web challenge I exposed port
5000in myDockerfile, so I'll use5000in the Port option (match your ports or face the wrath of connection errors 🔥).

Click on Create and enter the Flag
State →
Visible(because invisible challenges are only fun for you, not the players).
Click Finish (the challenge should be deployed successfully—if not, double-check your Docker setup).
You can verify it by going to Challenges in the Admin Panel; you should see your challenge listed there (if not, time to debug 🕵️♂️).

Verify the container plugin is working successfully:
- Exit the Admin Panel
- Go to the main page and click on the challenge you created.
- You should see the challenge description and a button to start the challenge (if not, you know the drill: debug).

- Click on Initiate Suffering (yes, that's really what it's called).
- You will be allocated a separate instance at a unique port ⚡ (because everyone deserves their own Docker pain).

 - Congrats! The plugin is working superbly ⚡😎 (go ahead, brag a little).
Step 9: Shifting the CTFd Instance to Cloud ☁️
- Zip the
CTFddirectory on your local machine:
sudo zip -r ctfd.zip /path/to/CTFd
- Upload the
ctfd.zipfile to your cloud server.
sudo scp -i /path/to/your/key ctfd.zip user@your-cloud-server:/path/to/destination

- Verify on cloud and unzip the
ctfd.zipfile:
ls
sudo unzip ctfd.zip

- Make sure nginx is not running (because port conflicts are a rite of passage):
- Stop the nginx service if it is running:
sudo systemctl stop nginx - Navigate to the
CTFddirectory: - Run the instance:
sudo docker-compose up -d

- Now you can access the CTFd instance via your browser through the static IP of your cloud server,
- Or through the domain you configured with Cloudflare (and yes, it should actually work now).

Step 10: Configuring and Deploying Containerized Challenges on Cloud 🛠️
- In the Admin Panel → Plugins → Containers:
- Set the Hostname to a subdomain you configured earlier in Cloudflare that has no proxy enabled.
- Leave all other settings as they are.
- Click Submit.

Now Bring the challenges that works on Docker to Cloud in a similar way we brought the ctfd.zip file.
- Zip the
challengedirectory on your local machine:
sudo zip -r challenge.zip /path/to/challenge- Bring it to the cloud through
scp:
sudo scp -i /path/to/your/key challenge.zip user@your-cloud-server:/path/to/destination
- Build the Docker image on the cloud server:
cd /path/to/destination
sudo docker build -t challenge-image .
- Go to the challenge in CTFd Admin Panel and verify the container settings.
- Make sure the Image is set to
challenge-image. - Click Update/Submit.
- Make sure the Image is set to
- Zip the

- Now you can test the challenge by clicking on the Initiate Suffering button (because nothing says "fun" like a little suffering).
- If everything is set up correctly, you should be able to access the challenge at the specified domain and port (if not, check your firewall, DNS, and Docker—again).

Note: Similar settings apply for other challenges that need nc. Just set the Connection type to TCP.
- Make sure the challenge
Dockerfileexposes the same port you specify in CTFd (consistency is key, unless you like debugging).
Step 11: Other CTFd Settings and Simple Challenge Deployement:
- Configure any additional settings in the CTFd Admin Panel as needed (because there’s always one more setting).
- For simple challenges, you can use the built-in challenge types and templates provided by CTFd.
- You can use either Standard or Dynamic templates (pick your poison).
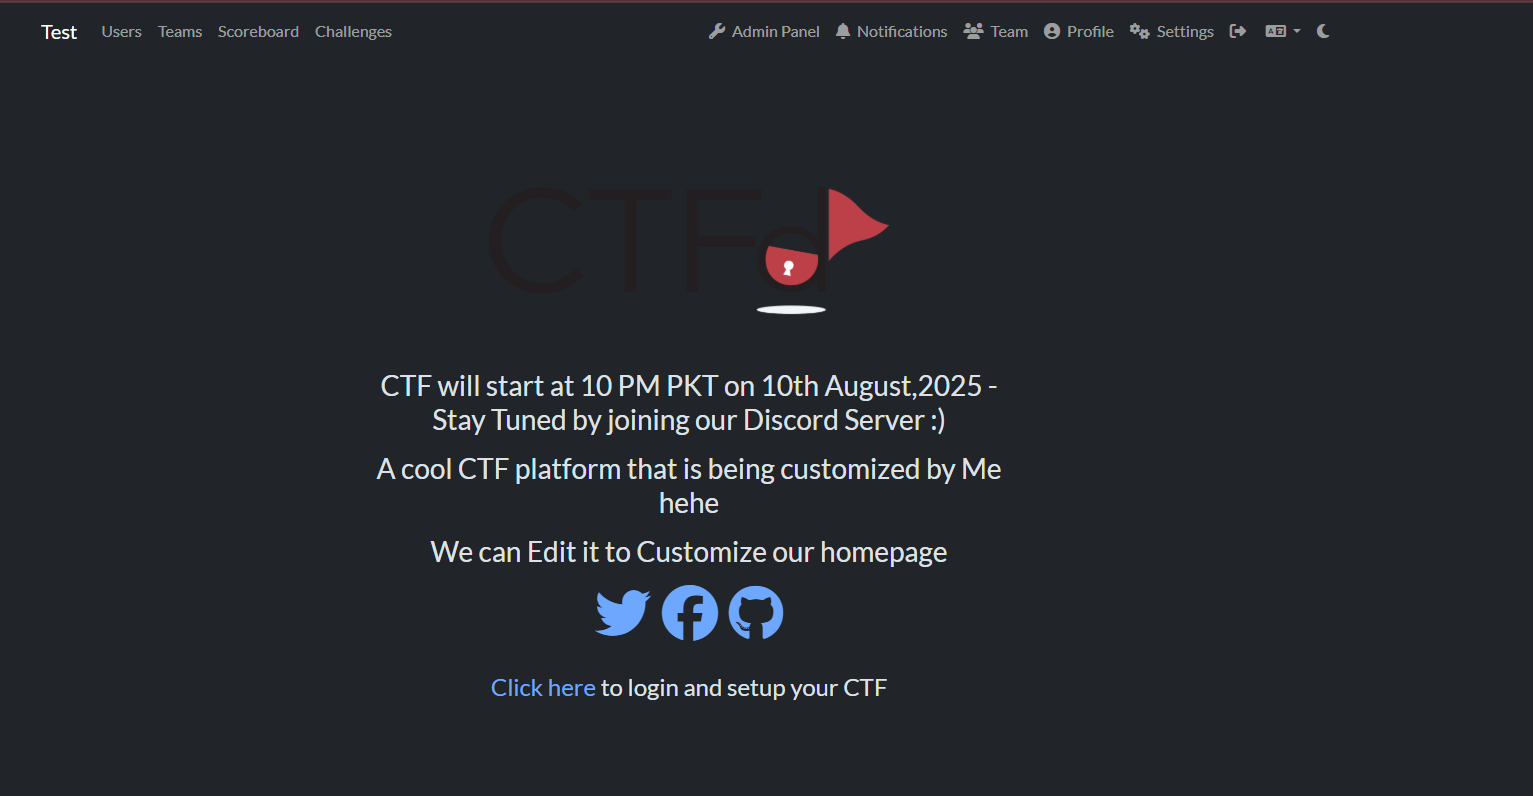
- You can access the CTFd instance at
http://your-cloud-server-static-ipfrom anywhere and deploy challenges easily. - You can customize the CTFd home page by modifying the HTML/CSS files in the
CTFddirectory or directly through the Admin Panel.- Go to Pages → All Pages (you can edit
indexto customize the home page) - Edit or create the desired page and make your changes.
- Save and preview your changes (and hope you didn’t break the layout).
- Go to Pages → All Pages (you can edit

- You can also configure things in the CTFd Admin Panel → Config:
- Logo
- Theme
- Start and End Time of CTF
- Visibility Settings (Challenges/Accounts/Scoreboard)
- Pause the CTF (for when you need a break, or just want to mess with your players 😏)

Lessons Learned
- Lightsail was easier to set up than EC2 for small–medium events (sorry, EC2 fans).
- Dockerizing challenges saved time during deployment and debugging (and saved my sanity).
- Cloudflare provided strong DDoS protection and easy SSL setup (10/10, would recommend).
- Always test challenges locally before deploying (unless you enjoy live troubleshooting in front of your participants 🫠).
References
- How to Host CTF
- CTFd Documentation
- AWS Lightsail Guide
- Cloudflare Documentation
- Docker Documentation
- CTFd Container Plugin
That’s a Wrap! 🎉
If you made it this far, congrats—you’re now officially more prepared to host a CTF than 99% of the internet. Whether you’re wrangling Docker containers, fighting with DNS, or just flexing your admin panel skills, remember: every CTF is a learning experience (sometimes for the host, sometimes for the players, usually for both). Good luck, have fun, and may your scoreboard always update in real time. 😉
:)
P.S. If you get stuck anywhere, feel free to contact me—no hesitation, no judgment. I’ve probably broken it before you did. :)